DIY Atomizer Coil Tutorial, Tips and Tools
Because DIY atomizers allow users to build coils themselves, their low usage cost and adjustable flavor make most vaping users gradually switch from prefabricated atomizers to DIY atomizers. Many users hesitate when moving to DIY atomizers, worried that t
Because DIY atomizers allow users to build their own coils, their low operating cost and adjustable flavor performance have led most vaping enthusiasts to gradually shift from prebuilt atomizers to DIY atomizers after getting started. Many users hesitate when making the switch, worrying that they do not know how to build coils. In fact, as long as you understand the principle that good tools are essential for doing a good job, coil building is actually quite simple. Prepare the necessary tools and materials, and master the key points of building and using coils, and you’ll find the process very manageable.
Essential tools and materials for coil building
1. Heating wire or prebuilt coils
As the heating element of the coil, wire is absolutely the first consumable to consider when building coils. High-quality wire provides excellent ramp-up speed and higher heat output, resulting in a better vaping experience. Meanwhile, today’s popular specialty coils save users the trouble of winding coils themselves; they only need to install the coil.
2. E-cigarette wicking cotton
As the medium that stores and delivers e-liquid, wicking cotton also plays the role of sealing e-liquid inside tank atomizers. There are many options for wicking cotton as well, and high-quality cotton offers faster e-liquid absorption, greater liquid retention, and no off-flavors during use.
3. Coil-building tools
The basic tools required for building coils generally include a coil jig, scissors, diagonal cutters, needle-nose pliers, screwdrivers, hex wrenches, ceramic tweezers, and bent tweezers. Users of mechanical devices must also have an ohm reader that can be used for dry firing coils. Buying tools individually can be rather troublesome, so choosing a complete tool kit is often the better option, as it not only provides a full set of tools but also usually offers more reliable quality.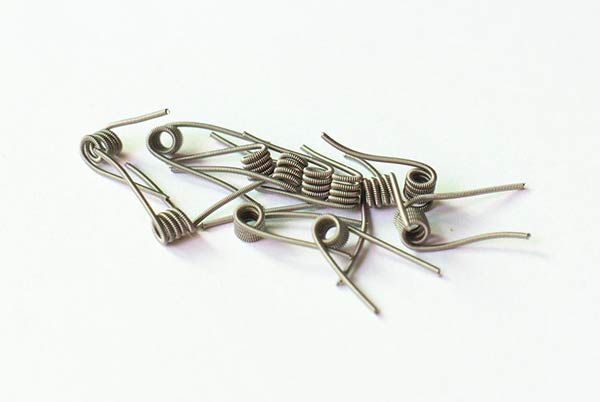 Coil-building tips
1. The coil must be firmly secured and must not touch the inner wall of the chamber
When securing the coil, make sure each lead is firmly locked in place by the screw or clamp so that the coil can heat evenly and quickly when powered. If the coil is not firmly secured or touches the inner wall of the atomizer chamber, it can cause resistance fluctuation issues and affect the vaping experience.
2. Before inserting cotton, make sure the coil heats evenly at the same time
For today’s mainstream wire and prebuilt coils, dry firing before inserting cotton is necessary. This ensures that the coil heats evenly and glows uniformly. It also allows an oxide layer to form on the coil surface, helping keep resistance from changing too drastically.
3. Pay attention to the amount of cotton and thin it appropriately according to the size of the juice ports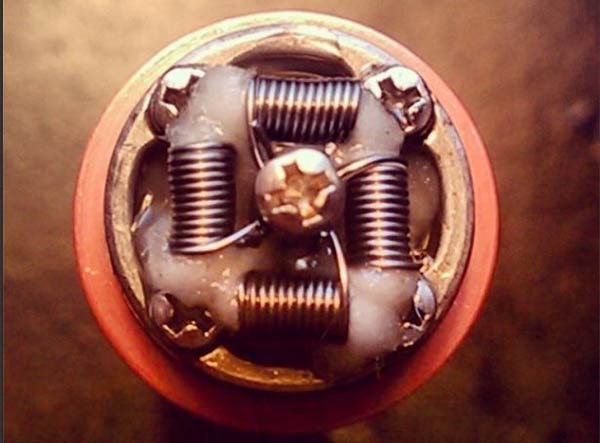 The cotton threaded through the coil should offer slight resistance when gently pulled. Too much or too little cotton can cause the coil to scorch the cotton. For tank atomizers, extra care should be taken with the cotton at the juice ports: it must fully cover the ports while still remaining somewhat fluffy to ensure smooth wicking.
Even when dealing with different atomizers, coil building still follows the same basic steps: winding or preparing the coil, securing it, dry firing, inserting cotton, and priming the coil. As long as you have all the necessary tools and materials before starting, and pay attention to the details and key points of the process, even beginners can quickly master coil building. After a few attempts, you’ll be able to build coils easily and efficiently.
Related DIY coil articles, click below to read:
How to make DIY specialty heating wire and the tools required
Essential DIY tool kit for vaping enthusiasts
How to make DIY heating wire
Essential tools and materials for coil building
1. Heating wire or prebuilt coils
As the heating element of the coil, wire is absolutely the first consumable to consider when building coils. High-quality wire provides excellent ramp-up speed and higher heat output, resulting in a better vaping experience. Meanwhile, today’s popular specialty coils save users the trouble of winding coils themselves; they only need to install the coil.
2. E-cigarette wicking cotton
As the medium that stores and delivers e-liquid, wicking cotton also plays the role of sealing e-liquid inside tank atomizers. There are many options for wicking cotton as well, and high-quality cotton offers faster e-liquid absorption, greater liquid retention, and no off-flavors during use.
3. Coil-building tools
The basic tools required for building coils generally include a coil jig, scissors, diagonal cutters, needle-nose pliers, screwdrivers, hex wrenches, ceramic tweezers, and bent tweezers. Users of mechanical devices must also have an ohm reader that can be used for dry firing coils. Buying tools individually can be rather troublesome, so choosing a complete tool kit is often the better option, as it not only provides a full set of tools but also usually offers more reliable quality.
Coil-building tips1. The coil must be firmly secured and must not touch the inner wall of the chamber
When securing the coil, make sure each lead is firmly locked in place by the screw or clamp so that the coil can heat evenly and quickly when powered. If the coil is not firmly secured or touches the inner wall of the atomizer chamber, it can cause resistance fluctuation issues and affect the vaping experience.
2. Before inserting cotton, make sure the coil heats evenly at the same time
For today’s mainstream wire and prebuilt coils, dry firing before inserting cotton is necessary. This ensures that the coil heats evenly and glows uniformly. It also allows an oxide layer to form on the coil surface, helping keep resistance from changing too drastically.
3. Pay attention to the amount of cotton and thin it appropriately according to the size of the juice ports
The cotton threaded through the coil should offer slight resistance when gently pulled. Too much or too little cotton can cause the coil to scorch the cotton. For tank atomizers, extra care should be taken with the cotton at the juice ports: it must fully cover the ports while still remaining somewhat fluffy to ensure smooth wicking.Even when dealing with different atomizers, coil building still follows the same basic steps: winding or preparing the coil, securing it, dry firing, inserting cotton, and priming the coil. As long as you have all the necessary tools and materials before starting, and pay attention to the details and key points of the process, even beginners can quickly master coil building. After a few attempts, you’ll be able to build coils easily and efficiently.
Related DIY coil articles, click below to read:
How to make DIY specialty heating wire and the tools required
Essential DIY tool kit for vaping enthusiasts
How to make DIY heating wire
Related Articles

Vaping News
Ahead of a Nationwide Ban, Hundreds of Russian Retailers Voluntarily Stop Selling Vapes
2026-04-16

Vaping News
Illegal Vape Brands Try to Evade FDA Scrutiny by Posing as “Made in the USA”
2026-04-08

Vaping News
Jordan’s New Tobacco Control Rules: Waterpipe Tobacco Market Set for Major Changes
2026-03-17