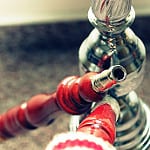
How to Make DIY Heating Coils
For vapers, aside from clouds and vapor, another major attraction of e-cigarettes is DIY. Enthusiasts often have shelves packed with e-liquid, heating wire, cotton, mods, and atomizers. After work each day, they open their tool kits, rebuild a new set of
For vapers, besides the smoke rings and vapor, another fascinating aspect of e-cigarettes is DIY.
DIY enthusiasts often have a cabinet filled with various e-liquids, heating wires, cotton, devices, and atomizers. Every day after work, they open their toolkits, rework a set of wires, replace two pieces of cotton, and refill a tank. Then, the room transforms into a wonderland. However, for newcomers, DIY seems like a profound subject, making them hesitant to try while also eager to dive in. Today, I will introduce several strategies for DIY heating wires, hoping to be of help to everyone. What is a heating wire?
As the name suggests, a heating wire is used to generate heat, vaporizing the e-liquid to produce smoke for the user to inhale.
The working principle of a heating wire is the same as that of other metal heating elements, relying on the phenomenon of electric heating when metal conducts electricity. Electric heating refers to the heat generated by the current passing through a conductor.
The heating wire itself is a metal conductor that emits heat and provides thermal energy when electrified.
Types of heating wires
Currently, there are mainly four types of heating wires on the market: iron-chromium wire, nickel-chromium wire, titanium wire, and stainless steel 316L wire. Below, we will introduce them one by one.
Iron-chromium wire
Currently, "Kanthal A1 wire" has become synonymous with iron-chromium wire. It is a composite material of iron and chromium, mainly used in power-type devices.
It is relatively easy to shape, made of hard material, low in cost, and has the most stable resistance value, which does not change during heating. However, its performance is unstable, has poor corrosion resistance, and is prone to rust.
Its high cost-performance ratio makes it suitable for practicing wire-wrapping techniques and is commonly used by players.
Nickel-chromium wire
NI80 is a nickel-chromium composite material that is currently widely used.
NI80 wire is softer, can be bent by hand, and does not conduct electricity between coils after oxidation. It heats quickly and evenly and has good corrosion resistance due to its low iron content. After burning the wire, a dark green oxidation layer forms on the surface, so it is normal for the wire to appear dark green after burning.
NI200 is pure nickel wire and is a type of temperature control wire.
Its resistance changes with temperature, allowing the current temperature of the heating wire to be calculated, thus achieving temperature control.
NI200 wire has minimal impact on the flavor of the e-liquid and can achieve a more stable taste through temperature control. However, being made of pure nickel, it is too soft, which can lead to deformation when threading cotton.
Titanium wire
Titanium wire is made of pure titanium and is also a type of temperature control wire. Unlike NI200, it can be tightly wound because it forms a dense oxide film during heating, preventing short circuits.
Titanium wire heats up quickly, has higher stability than nickel wire, and also improves safety, allowing for stable flavor through temperature control. However, titanium wire has too low resistance and cannot be used in mechanical devices and variable wattage modes; it is also relatively tough, making it somewhat difficult to wrap.
Stainless steel 316L wire
Stainless steel 316L wire is the latest type of heating wire material, with the highest safety.
SS316L wire has excellent performance and flavor, heats quickly, and has good plasticity (harder than NI200 and softer than titanium wire). However, it appeared later, and some devices currently do not support it.
Resistance of heating wires
The resistance of heating wires largely determines the size of the vapor and the flavor. Vapers know that for large vapor, low-resistance heating wires are used, while for flavor restoration, high-resistance heating wires are preferred.
Resistance is the obstruction of current by a conductor. Under the same voltage conditions, the smaller the resistance, the larger the current, and the greater the heating power, resulting in larger vapor.
With the same length of heating wire, the thicker the wire, the smaller the resistance; with the same thickness, the shorter the wire, the smaller the resistance.
Generally, heating wire resistance between 0.2-1.0 is considered large vapor type, while above 1.0 is for flavor type. Do not easily try heating wires with resistance below 0.2, as it may pose a danger.
About single and dual coils
When making heating wires, if the smoke produced by a single heating wire does not meet the player's needs, two or more heating wire coils can be installed in the same atomizer.
Typically in multiples of two, such as dual, quad, or octuple coils; it is worth noting that the more parallel coils, the smaller the total resistance, requiring coordination between resistance and the number of coils.
For example: when the resistance of a single coil is 0.8, dual coils will be 0.4, and quad coils will be 0.2 (with the same thickness, diameter, and number of turns). This is because dual coils conduct current in two separate loops, doubling the overall output, thus reducing resistance. However, lengthening the same heating wire will only increase resistance, not decrease it.
Wire wrapping methods
Tight wrapping: A method that tightly arranges heating wires, commonly used with power-type heating wires. The completed shape:
Advantages: Dense heating, concentrated flavor, easy to operate.
Disadvantages: Due to dense heating, concentrated heat can cause the cotton to burn out; typically, the cores that are burnt are mostly tightly wrapped. This can be improved by increasing the diameter of the coil, and it is recommended to use a diameter of 2.5mm or more.
Wrapping tips: Beginners may experience unevenness during initial production; there is no need to worry too much. After installing it in the atomizer, heat it until red, then cut off the power, and use tweezers to shape it.
Loose wrapping: Heating wires are evenly wound on a wire-wrapping rod with a certain distance between each wire, generally equal to the wire's diameter. This method is often used for NI200 temperature control wire. The completed shape:
Advantages: Even heating, not easily burnt. Suitable for temperature control or large vapor types. Large vapor can be continuously drawn without burning.
Disadvantages: Virgo's Achilles' heel; there is no need to worry about whether the spacing is uniform, as the effects are similar. In power mode, excessive power may cause leaking oil.
Wrapping tips: Adjust the spacing of the wires appropriately; there is no need to ensure that every wire's gap is consistent, as long as no two wires touch each other.
Twisted wire: Two wires of different or the same thickness are twisted together to achieve a state where the wires are completely together. This can compensate for the high resistance of a single wire that does not achieve the desired vapor. It also allows the e-liquid to come into better contact with the heating wire. The completed shape:
Advantages: Balanced resistance, effectively prevents leaking oil under suitable power conditions. Essential for dripping!
Disadvantages: It is labor-intensive and often causes hand injuries.
Wrapping tips: If you do not have electric tools, fix one end, for example, by stepping on it, and then rotate the other end. Be careful to keep it taut during the process; otherwise, the final wire's effect will be poor. If you have a drill, using electric tools will save effort! Be careful not to get pricked by the wire ends!
Same wire dual coils: Using the same heating wire to make two coils, usually used in three-post atomizer bases. The completed shape:
Advantages: Can significantly improve the problem of unsynchronized heating when beginners make dual coils. It is also easier to install in atomizers with slightly flawed designs like the Mage.
Disadvantages: Requires good logical thinking; otherwise, it is easy to wrap in the wrong direction.
Wrapping tips: You can draw a diagram on a piece of paper in a single stroke to visualize the desired shape, then proceed to wrap. Consider the length of the middle part; if it is too long, trimming it will be meaningless, and the middle part can be processed later.
Dual wire parallel wrapping: Using two heating wires to wrap around the same center—almost equivalent to dual coils. The completed shape:
Advantages: Can effectively increase vapor volume when used in atomizers not suitable for dual coils.
Disadvantages: Because the wrapped wire coils are generally longer, there may be issues with oil supply.
Wire installation methods
Currently, the following methods can be used in 80% of atomizers on the market. Of course, this is also a way to inspire new inventions, as there are many new methods emerging. As a beginner's tutorial, I will focus on the following methods.
Horizontal wire installation method
This installation method is currently the most commonly used, bar none. It can highlight the characteristics of the atomizer, whether the flavor is intense or mild. It can also serve as a way to test the flavor of the atomizer.
Vertical wire installation method
Generally, the vertical wire installation is to enhance flavor, concentrating the vapor at one point during evaporation, more prominently highlighting the characteristics of the e-liquid. It is suitable for atomizers with poor flavor. During the installation process, be careful of short circuits in the heating wire, as the operation is more complex. Therefore, it is recommended that beginners perform a burn test after installation to check for short circuits.
Dual screw horizontal wire installation method
This is similar to the horizontal wire installation, just with multiple screws.
Horizontal dual coil installation method
For dual coil installation, it is essential to ensure that both sets of heating wires light up simultaneously after being powered for better performance. Therefore, it is crucial to ensure that the lengths of the wire ends on both sides are consistent.
Burning wire
Burning wire refers to the process of checking the heating wire after successfully installing it, which includes checking whether the heating wire heats evenly or has short circuits, allowing for timely adjustments to avoid not achieving the desired effect after cotton is installed.
Regarding burning wire, remember the following principles: power-type heating wires need to be burned, while temperature control does not!
Additionally, ensure that the heating wire lights up evenly from the center to both sides. If not, there are two ways to adjust it.
1. Use ceramic tweezers (non-short-circuit material). After the heating wire turns red, cut the power! Pinch the entire heating wire coil tightly from both sides, and after the heating wire cools, release. Check again by powering on, repeating until the heating wire lights up evenly from the center to both sides.
2. After the heating wire cools, insert a wire-wrapping rod, lifting or pressing the heating wire to tighten it, and re-burn the wire until it lights up evenly from the center to both sides.
Note: During the burning process, the resistance may fluctuate slightly, which is normal. Burning wire is also a step to stabilize resistance.
Once you have mastered the above strategies, you can try the advanced version of DIY heating wires, commonly known as fancy coils.
What is a heating wire?
As the name suggests, a heating wire is used to generate heat, vaporizing the e-liquid to produce smoke for the user to inhale.
The working principle of a heating wire is the same as that of other metal heating elements, relying on the phenomenon of electric heating when metal conducts electricity. Electric heating refers to the heat generated by the current passing through a conductor.
The heating wire itself is a metal conductor that emits heat and provides thermal energy when electrified.
Types of heating wires
Currently, there are mainly four types of heating wires on the market: iron-chromium wire, nickel-chromium wire, titanium wire, and stainless steel 316L wire. Below, we will introduce them one by one.
Iron-chromium wire
Currently, "Kanthal A1 wire" has become synonymous with iron-chromium wire. It is a composite material of iron and chromium, mainly used in power-type devices.
It is relatively easy to shape, made of hard material, low in cost, and has the most stable resistance value, which does not change during heating. However, its performance is unstable, has poor corrosion resistance, and is prone to rust.
Its high cost-performance ratio makes it suitable for practicing wire-wrapping techniques and is commonly used by players.
Nickel-chromium wire
NI80 is a nickel-chromium composite material that is currently widely used.
NI80 wire is softer, can be bent by hand, and does not conduct electricity between coils after oxidation. It heats quickly and evenly and has good corrosion resistance due to its low iron content. After burning the wire, a dark green oxidation layer forms on the surface, so it is normal for the wire to appear dark green after burning.
NI200 is pure nickel wire and is a type of temperature control wire.
Its resistance changes with temperature, allowing the current temperature of the heating wire to be calculated, thus achieving temperature control.
NI200 wire has minimal impact on the flavor of the e-liquid and can achieve a more stable taste through temperature control. However, being made of pure nickel, it is too soft, which can lead to deformation when threading cotton.
Titanium wire
Titanium wire is made of pure titanium and is also a type of temperature control wire. Unlike NI200, it can be tightly wound because it forms a dense oxide film during heating, preventing short circuits.
Titanium wire heats up quickly, has higher stability than nickel wire, and also improves safety, allowing for stable flavor through temperature control. However, titanium wire has too low resistance and cannot be used in mechanical devices and variable wattage modes; it is also relatively tough, making it somewhat difficult to wrap.
Stainless steel 316L wire
Stainless steel 316L wire is the latest type of heating wire material, with the highest safety.
SS316L wire has excellent performance and flavor, heats quickly, and has good plasticity (harder than NI200 and softer than titanium wire). However, it appeared later, and some devices currently do not support it.
Resistance of heating wires
The resistance of heating wires largely determines the size of the vapor and the flavor. Vapers know that for large vapor, low-resistance heating wires are used, while for flavor restoration, high-resistance heating wires are preferred.
Resistance is the obstruction of current by a conductor. Under the same voltage conditions, the smaller the resistance, the larger the current, and the greater the heating power, resulting in larger vapor.
With the same length of heating wire, the thicker the wire, the smaller the resistance; with the same thickness, the shorter the wire, the smaller the resistance.
Generally, heating wire resistance between 0.2-1.0 is considered large vapor type, while above 1.0 is for flavor type. Do not easily try heating wires with resistance below 0.2, as it may pose a danger.
About single and dual coils
When making heating wires, if the smoke produced by a single heating wire does not meet the player's needs, two or more heating wire coils can be installed in the same atomizer.
Typically in multiples of two, such as dual, quad, or octuple coils; it is worth noting that the more parallel coils, the smaller the total resistance, requiring coordination between resistance and the number of coils.
For example: when the resistance of a single coil is 0.8, dual coils will be 0.4, and quad coils will be 0.2 (with the same thickness, diameter, and number of turns). This is because dual coils conduct current in two separate loops, doubling the overall output, thus reducing resistance. However, lengthening the same heating wire will only increase resistance, not decrease it.
Wire wrapping methods
Tight wrapping: A method that tightly arranges heating wires, commonly used with power-type heating wires. The completed shape:
Advantages: Dense heating, concentrated flavor, easy to operate.
Disadvantages: Due to dense heating, concentrated heat can cause the cotton to burn out; typically, the cores that are burnt are mostly tightly wrapped. This can be improved by increasing the diameter of the coil, and it is recommended to use a diameter of 2.5mm or more.
Wrapping tips: Beginners may experience unevenness during initial production; there is no need to worry too much. After installing it in the atomizer, heat it until red, then cut off the power, and use tweezers to shape it.
Loose wrapping: Heating wires are evenly wound on a wire-wrapping rod with a certain distance between each wire, generally equal to the wire's diameter. This method is often used for NI200 temperature control wire. The completed shape:
Advantages: Even heating, not easily burnt. Suitable for temperature control or large vapor types. Large vapor can be continuously drawn without burning.
Disadvantages: Virgo's Achilles' heel; there is no need to worry about whether the spacing is uniform, as the effects are similar. In power mode, excessive power may cause leaking oil.
Wrapping tips: Adjust the spacing of the wires appropriately; there is no need to ensure that every wire's gap is consistent, as long as no two wires touch each other.
Twisted wire: Two wires of different or the same thickness are twisted together to achieve a state where the wires are completely together. This can compensate for the high resistance of a single wire that does not achieve the desired vapor. It also allows the e-liquid to come into better contact with the heating wire. The completed shape:
Advantages: Balanced resistance, effectively prevents leaking oil under suitable power conditions. Essential for dripping!
Disadvantages: It is labor-intensive and often causes hand injuries.
Wrapping tips: If you do not have electric tools, fix one end, for example, by stepping on it, and then rotate the other end. Be careful to keep it taut during the process; otherwise, the final wire's effect will be poor. If you have a drill, using electric tools will save effort! Be careful not to get pricked by the wire ends!
Same wire dual coils: Using the same heating wire to make two coils, usually used in three-post atomizer bases. The completed shape:
Advantages: Can significantly improve the problem of unsynchronized heating when beginners make dual coils. It is also easier to install in atomizers with slightly flawed designs like the Mage.
Disadvantages: Requires good logical thinking; otherwise, it is easy to wrap in the wrong direction.
Wrapping tips: You can draw a diagram on a piece of paper in a single stroke to visualize the desired shape, then proceed to wrap. Consider the length of the middle part; if it is too long, trimming it will be meaningless, and the middle part can be processed later.
Dual wire parallel wrapping: Using two heating wires to wrap around the same center—almost equivalent to dual coils. The completed shape:
Advantages: Can effectively increase vapor volume when used in atomizers not suitable for dual coils.
Disadvantages: Because the wrapped wire coils are generally longer, there may be issues with oil supply.
Wire installation methods
Currently, the following methods can be used in 80% of atomizers on the market. Of course, this is also a way to inspire new inventions, as there are many new methods emerging. As a beginner's tutorial, I will focus on the following methods.
Horizontal wire installation method
This installation method is currently the most commonly used, bar none. It can highlight the characteristics of the atomizer, whether the flavor is intense or mild. It can also serve as a way to test the flavor of the atomizer.
Vertical wire installation method
Generally, the vertical wire installation is to enhance flavor, concentrating the vapor at one point during evaporation, more prominently highlighting the characteristics of the e-liquid. It is suitable for atomizers with poor flavor. During the installation process, be careful of short circuits in the heating wire, as the operation is more complex. Therefore, it is recommended that beginners perform a burn test after installation to check for short circuits.
Dual screw horizontal wire installation method
This is similar to the horizontal wire installation, just with multiple screws.
Horizontal dual coil installation method
For dual coil installation, it is essential to ensure that both sets of heating wires light up simultaneously after being powered for better performance. Therefore, it is crucial to ensure that the lengths of the wire ends on both sides are consistent.
Burning wire
Burning wire refers to the process of checking the heating wire after successfully installing it, which includes checking whether the heating wire heats evenly or has short circuits, allowing for timely adjustments to avoid not achieving the desired effect after cotton is installed.
Regarding burning wire, remember the following principles: power-type heating wires need to be burned, while temperature control does not!
Additionally, ensure that the heating wire lights up evenly from the center to both sides. If not, there are two ways to adjust it.
1. Use ceramic tweezers (non-short-circuit material). After the heating wire turns red, cut the power! Pinch the entire heating wire coil tightly from both sides, and after the heating wire cools, release. Check again by powering on, repeating until the heating wire lights up evenly from the center to both sides.
2. After the heating wire cools, insert a wire-wrapping rod, lifting or pressing the heating wire to tighten it, and re-burn the wire until it lights up evenly from the center to both sides.
Note: During the burning process, the resistance may fluctuate slightly, which is normal. Burning wire is also a step to stabilize resistance.
Once you have mastered the above strategies, you can try the advanced version of DIY heating wires, commonly known as fancy coils.Related Articles

Vaping News
Ahead of a Nationwide Ban, Hundreds of Russian Retailers Voluntarily Stop Selling Vapes
2026-04-16

Vaping News
Illegal Vape Brands Try to Evade FDA Scrutiny by Posing as “Made in the USA”
2026-04-08
Vaping News
Jordan’s New Tobacco Control Rules: Waterpipe Tobacco Market Set for Major Changes
2026-03-17