How Do You Disassemble a Vaping Device Atomizer Coil? Let’s Take a Look!
How do you disassemble a vaping device atomizer coil? If you want your beloved vaping device to last longer, you need to clean the atomizer regularly and replace the coil. This involves the question of how to disassemble a vaping device atomizer coil. Act
How to disassemble an e-cigarette atomizer coil? If you want your beloved e-cigarette to last longer, you need to regularly clean the atomizer and replace the atomizer coil. This brings us to the question of how to disassemble an e-cigarette atomizer coil, which is actually quite simple; you can master it after hearing it once.
How to disassemble an e-cigarette atomizer coil? DIY atomizers on the market vary, but the cleaning methods are similar. As long as you follow the above methods, you don't have to worry about the hygiene of the atomizer.
Most users currently use pre-made atomizers, so let's take a pre-made atomizer as an example for disassembly! A pre-made tank atomizer generally consists of three main parts: the top cap, the tank, and the base, all of which can be disassembled. After disassembling the atomizer, all the O-rings can also be removed, and each component should be placed in order according to the disassembly sequence for cleaning and later installation. There are many methods for cleaning the atomizer, such as using alcohol, clean water, or an ultrasonic cleaner.
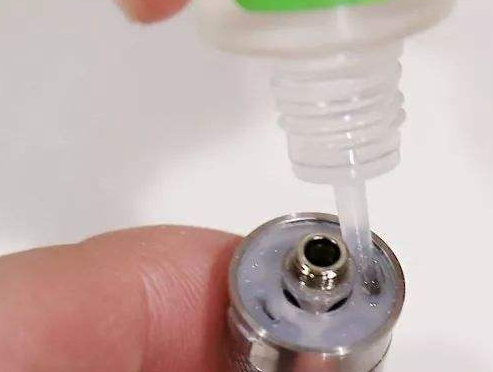
If the atomizer coil has serious carbon buildup, has a burnt taste, or irritates the throat when vaping, it needs to be replaced. When replacing, first rotate counterclockwise to open the bottom of the atomizer, then rotate counterclockwise to unscrew the old atomizer coil, and screw in the new or spare atomizer coil. At this point, rotate clockwise to ensure the atomizer coil is tightened. Finally, rotate clockwise to screw the previously opened bottom of the atomizer back on.
How to disassemble an e-cigarette atomizer coil? Before replacing the coil, please ensure that there is no e-liquid in the atomizer to avoid leakage!
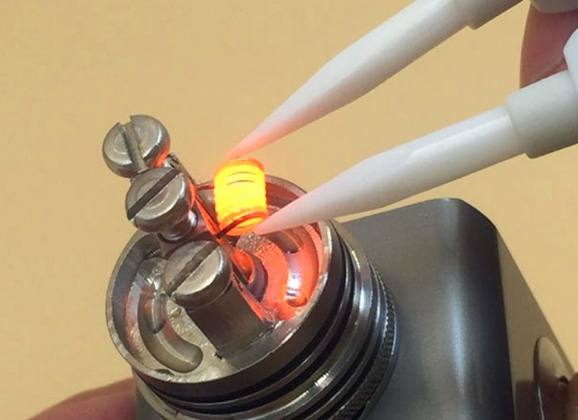
The EMODE RFA tank atomizer, featuring RFC heating elements, has simplified the traditional structure of coils and cotton. This RFC element can be reused over a million times, making the rebuilding process extremely simple; you just need to cut an appropriate amount of cotton and insert it between the two heating plates.
Note: When screwing on the new atomizer coil, be sure to tighten it properly, but do not overtighten it to avoid difficulties in removing it next time.
How long can an e-cigarette atomizer be used?
Under normal conditions, the atomizer coil in an e-cigarette needs to be replaced every 1-3 months. There are many types of e-cigarette atomizers, some of which allow for coil replacement, while others do not. Some produce a large amount of vapor, while others produce less (depending on the resistance). Generally, they are around 2.4 ohms.
Additionally, the RFC heating element has a simple self-cleaning function; just dry burn the heating element at a power not exceeding 30W to remove carbon buildup and other impurities, making it convenient for lazy users like me!
How to disassemble an e-cigarette atomizer coil? DIY atomizers on the market vary, but the cleaning methods are similar. As long as you follow the above methods, you don't have to worry about the hygiene of the atomizer.
Most users currently use pre-made atomizers, so let's take a pre-made atomizer as an example for disassembly! A pre-made tank atomizer generally consists of three main parts: the top cap, the tank, and the base, all of which can be disassembled. After disassembling the atomizer, all the O-rings can also be removed, and each component should be placed in order according to the disassembly sequence for cleaning and later installation. There are many methods for cleaning the atomizer, such as using alcohol, clean water, or an ultrasonic cleaner.
If the atomizer coil has serious carbon buildup, has a burnt taste, or irritates the throat when vaping, it needs to be replaced. When replacing, first rotate counterclockwise to open the bottom of the atomizer, then rotate counterclockwise to unscrew the old atomizer coil, and screw in the new or spare atomizer coil. At this point, rotate clockwise to ensure the atomizer coil is tightened. Finally, rotate clockwise to screw the previously opened bottom of the atomizer back on.
How to disassemble an e-cigarette atomizer coil? Before replacing the coil, please ensure that there is no e-liquid in the atomizer to avoid leakage!
The EMODE RFA tank atomizer, featuring RFC heating elements, has simplified the traditional structure of coils and cotton. This RFC element can be reused over a million times, making the rebuilding process extremely simple; you just need to cut an appropriate amount of cotton and insert it between the two heating plates.
Note: When screwing on the new atomizer coil, be sure to tighten it properly, but do not overtighten it to avoid difficulties in removing it next time.
How long can an e-cigarette atomizer be used?
Under normal conditions, the atomizer coil in an e-cigarette needs to be replaced every 1-3 months. There are many types of e-cigarette atomizers, some of which allow for coil replacement, while others do not. Some produce a large amount of vapor, while others produce less (depending on the resistance). Generally, they are around 2.4 ohms.
Additionally, the RFC heating element has a simple self-cleaning function; just dry burn the heating element at a power not exceeding 30W to remove carbon buildup and other impurities, making it convenient for lazy users like me!
Related Articles

Vaping News
Ahead of a Nationwide Ban, Hundreds of Russian Retailers Voluntarily Stop Selling Vapes
2026-04-16

Vaping News
Illegal Vape Brands Try to Evade FDA Scrutiny by Posing as “Made in the USA”
2026-04-08

Vaping News
Jordan’s New Tobacco Control Rules: Waterpipe Tobacco Market Set for Major Changes
2026-03-17