AUG VAPE Templar RDA Atomizer
Today I received the Templar RDA. While atomizers these days may not offer many true breakthroughs, this one still has a few noteworthy points. First, here is the setup used for testing: Atomizer: Templar RDA Main device: GEEK VAPE rugged mod Coil: alien
Today I received this Templar RDA atomizer. Although there haven't been many breakthroughs in atomizers lately,
this atomizer still has a few noteworthy points. First, let me introduce the equipment used: Atomizer: Templar RDA Templar Knight Mod: GEEK VAPE waterproof mod Coil: Alien wire Cotton: Bacon cotton Resistance: Single coil 0.3 Output: 40W Alright, let’s start with a picture and then I’ll elaborate.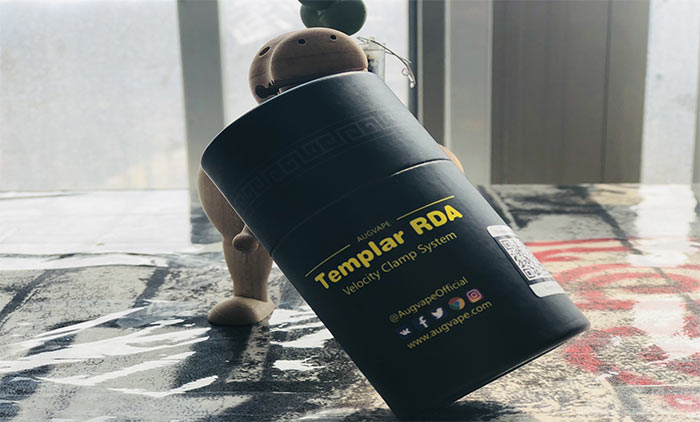 It still comes in a cylindrical package, as the shape of the atomizer is suitable for this type of outer packaging.
The lid is thick with protective cotton, and the metal atomizer is not afraid of bumps. For those with glass tanks, like the General's PANDA series,
I personally feel quite safe with this kind of packaging.
The main body is short and compact, but I didn’t quite understand this logo, which looks like a giant sword and a Spartan-like helmet…
Inside the packaging, I particularly like the transparent tank, whether it’s glass or acrylic, as it’s nice to see the inside.
It includes an acrylic outer tank, a single coil kit, a drip tip conversion ring, bottom fill electrode, and various O-rings.
The single coil kit assembly diagram is a good choice for someone like me who always sticks to single coils, but I feel it’s somewhat unnecessary…
The acrylic outer tank also has a drip tip conversion interface for the metal tank. This atomizer has a notch, which serves to fix the airflow position, and I think it’s quite convenient. We’ve all experienced the frustration of an atomizer that won’t unscrew, but with this notch, you can leverage it easily to unscrew the atomizer.
Following the trend, there’s a bottom fill electrode, which depends on personal preference. I still prefer the traditional top filling method.
Here’s a disassembly diagram showing the drip tip, airflow adjustment layer, outer tank, and base.
It still uses a pressure line method, but the current dual-hole design can hold the coil more accurately and tightly. I was quite careful when removing the upper part, as I was worried about the screws falling out and having to put them back in,
but this design is quite thoughtful; the screws and the upper part have a small clip that holds them in place, preventing them from falling out… this greatly reduces the chances of losing parts and causing frustration.
Wicking is still single coil, haha, since there’s a single coil plug, I decided to give it a try. Wicking is very simple and secure; I didn’t take a picture of the coil wrapping tool, but I really like the stable feel of it.
I used the acrylic tank for testing, but the airflow was a bit close to the tank wall, making the draw a bit tight, so I removed it. However, the airflow resistance of the acrylic tank is still greater than that of the metal one.
Also, the electrode screws are cross screws, but the horizontal and vertical lengths are not the same, meaning if you only have a large flathead screwdriver, you can still screw it in, and if you have a small one, you can still use it. This is also a thoughtful little design.
The acrylic tank looks quite detailed at the bottom, and the electrodes are relatively flat.
Now let’s talk about the airflow adjustment; you can adjust it according to your preferred draw resistance.
As shown in the picture, by rotating the airflow adjustment layer below the drip tip, you can set your desired draw resistance.
It still comes in a cylindrical package, as the shape of the atomizer is suitable for this type of outer packaging.
The lid is thick with protective cotton, and the metal atomizer is not afraid of bumps. For those with glass tanks, like the General's PANDA series,
I personally feel quite safe with this kind of packaging.
The main body is short and compact, but I didn’t quite understand this logo, which looks like a giant sword and a Spartan-like helmet…
Inside the packaging, I particularly like the transparent tank, whether it’s glass or acrylic, as it’s nice to see the inside.
It includes an acrylic outer tank, a single coil kit, a drip tip conversion ring, bottom fill electrode, and various O-rings.
The single coil kit assembly diagram is a good choice for someone like me who always sticks to single coils, but I feel it’s somewhat unnecessary…
The acrylic outer tank also has a drip tip conversion interface for the metal tank. This atomizer has a notch, which serves to fix the airflow position, and I think it’s quite convenient. We’ve all experienced the frustration of an atomizer that won’t unscrew, but with this notch, you can leverage it easily to unscrew the atomizer.
Following the trend, there’s a bottom fill electrode, which depends on personal preference. I still prefer the traditional top filling method.
Here’s a disassembly diagram showing the drip tip, airflow adjustment layer, outer tank, and base.
It still uses a pressure line method, but the current dual-hole design can hold the coil more accurately and tightly. I was quite careful when removing the upper part, as I was worried about the screws falling out and having to put them back in,
but this design is quite thoughtful; the screws and the upper part have a small clip that holds them in place, preventing them from falling out… this greatly reduces the chances of losing parts and causing frustration.
Wicking is still single coil, haha, since there’s a single coil plug, I decided to give it a try. Wicking is very simple and secure; I didn’t take a picture of the coil wrapping tool, but I really like the stable feel of it.
I used the acrylic tank for testing, but the airflow was a bit close to the tank wall, making the draw a bit tight, so I removed it. However, the airflow resistance of the acrylic tank is still greater than that of the metal one.
Also, the electrode screws are cross screws, but the horizontal and vertical lengths are not the same, meaning if you only have a large flathead screwdriver, you can still screw it in, and if you have a small one, you can still use it. This is also a thoughtful little design.
The acrylic tank looks quite detailed at the bottom, and the electrodes are relatively flat.
Now let’s talk about the airflow adjustment; you can adjust it according to your preferred draw resistance.
As shown in the picture, by rotating the airflow adjustment layer below the drip tip, you can set your desired draw resistance.