How to Make Alien Clapton Coils for Vaping
Fancy coils have always been a favorite among DIY vapers. Whether it’s the exceptional flavor or the eye-catching appearance, they offer exactly what many enthusiasts want. But high-priced prebuilt coils often keep people from trying them. Since it’s DIY,
Fancy coils have always been something of a creed among DIY players. Whether it’s the amazing flavor or the cool appearance, they’re exactly what enthusiasts want. Unfortunately, the high price of ready-made specialty coils keeps many people from trying them. But since it’s DIY, why not make a custom coil yourself? Today, Xiao Wai will show you how to make Alien Clapton coils!
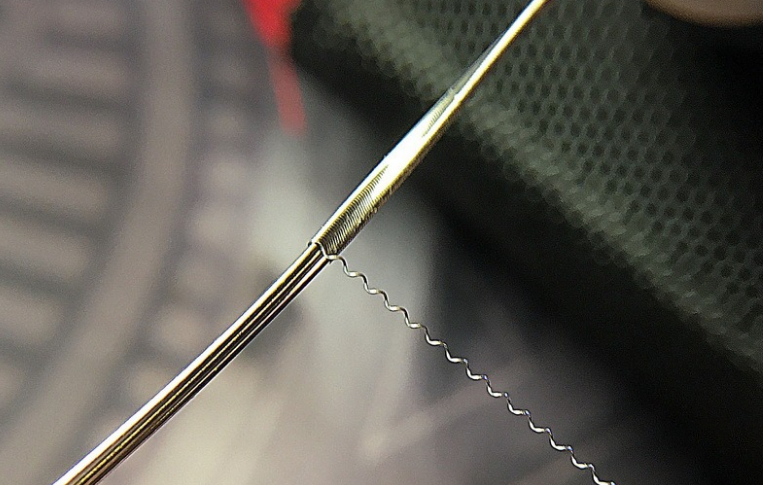
Tools to prepare: a power drill, regular resistance wire (commonly 24G, 26G, 28G), and outer wrap wire in finer gauges (commonly 34G, 36G, 38G). This time we’ll use Flash Wicks wire and a Coil Master tool kit. As a DIY vaper, you probably already have ceramic tweezers and similar tools, so we won’t go into all of those one by one. Once everything is ready, let’s get started! 1. Preparation First, cut three pieces of core wire to the same length (30 cm each in this demo). Clamp one end with the drill, secure the other end with pliers, and pull hard to straighten the wire. Then start the drill and rotate it moderately so the bent wire becomes straight. This time Xiao Wai is using 0.32 wire (28G). If you prefer a more aggressive build, 26G or even 24G is also fine. As you can see, the straightened wire is much straighter than before and better suited for the next steps. 2. Prelude to the build — making the Alien outer wire After straightening all three core wires, you can start making the outer wire. First, wrap one single-core Clapton using the outer wire over a core wire. Here, Xiao Wai uses 40G wrap wire. Since everyone has different habits, Xiao Wai prefers holding the drill in the right hand and the wire spool in the left. One thing to note here: don’t grip the spool too tightly. It needs to rotate freely, and your wrist has to keep up with the speed as well. After finishing the outer wrap, slowly separate the wrap wire from the core wire. Simply put, just pull it off directly. Hold both ends of the removed wrap wire and pull outward. Important! Remember this! Before it takes shape, do not let go midway, and don’t allow the wire to spring back. Pull the wire directly until it forms a wavy shape. As for how far to stretch it, Xiao Wai personally uses the width of three wires placed side by side to judge the spacing between two waves running in the same direction. Slightly narrower than the width of the three wires side by side is ideal. 3. Making the Alien Clapton coil Clamp the three core wires side by side in the drill. They must not form a pyramid shape—they have to stay parallel. Then wrap the prepared outer wire layer by layer around the core wires. If you’re not experienced, go slowly and don’t rush. If each wave sits neatly against the outer two core wires, that means you’re doing it correctly. Then continue wrapping little by little. Don’t pull too hard with the hand holding the outer wire. Try to feed the wire onto the core wires while keeping the wave pattern from deforming.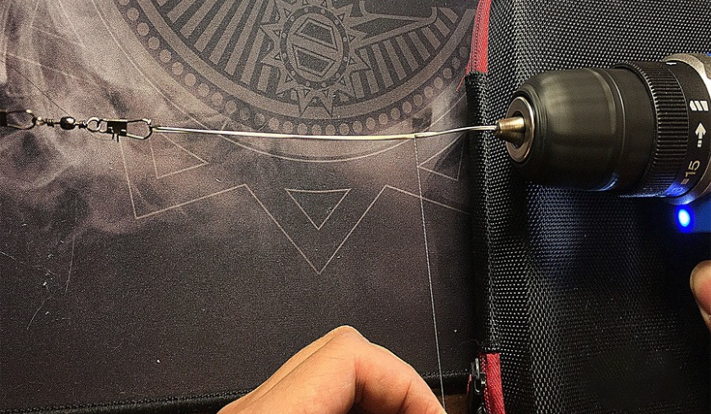 Tilt your hand slightly toward the drill so the outer wire grips tightly.
Be patient during the process and don’t get impatient. At this point, the Alien Clapton wire is basically formed, though it may not look very special just yet.
Once it’s wrapped into a coil, the pattern will become visible.
Tilt your hand slightly toward the drill so the outer wire grips tightly.
Be patient during the process and don’t get impatient. At this point, the Alien Clapton wire is basically formed, though it may not look very special just yet.
Once it’s wrapped into a coil, the pattern will become visible.
 Enjoy the satisfaction of DIY.
Users can mix and match different wire gauges according to their preferences. If you like a more aggressive setup, use 24G. If you prefer something milder, use 28G. As for the outer wrap, thicker wire produces bigger vapor, while thinner wire gives a finer, smoother vapor. Choose according to your own skill level and familiarity with coil building.
That concludes this Alien Clapton coil tutorial. Copyright notice: article author “Xiao Wai”
Enjoy the satisfaction of DIY.
Users can mix and match different wire gauges according to their preferences. If you like a more aggressive setup, use 24G. If you prefer something milder, use 28G. As for the outer wrap, thicker wire produces bigger vapor, while thinner wire gives a finer, smoother vapor. Choose according to your own skill level and familiarity with coil building.
That concludes this Alien Clapton coil tutorial. Copyright notice: article author “Xiao Wai”