What Temperature and Resistance Settings Work Best in Vaping Temperature Control Mode?
The mainstream box mods released this year basically all come with temperature control mode. Temperature control is a rather special output mode in vaping devices. For someone like me who uses it to replace cigarettes, it’s truly a blessing. However, alth
This year's mainstream box mods basically come with temperature control mode, which is a relatively unique output mode for electronic cigarettes. For someone like me, who is transitioning from smoking, this is truly a blessing. However, despite significant improvements compared to early temperature control box mods, achieving the right flavor still requires constant adjustments and tastings. Sometimes, no matter how much you adjust, even at the highest temperature, you still can't reach the desired flavor. Where does the problem lie? Here, I will share my personal usage insights to spark discussion.
To facilitate discussion, let's first review some basic concepts from high school physics, which will help us enter the subsequent discussion.
The following gray text is purely theoretical; if you find it dull, feel free to skip to the conclusion.
 【Temperature Coefficient of Resistance】
The temperature coefficient of resistance (TCR) indicates the relative change in resistance when the temperature changes by 1 degree. It is the ratio of the increase in resistance to the original resistance when the temperature rises by 1°C. The unit is ppm/°C. The definition is as follows: TCR=dR/R*dT
For example, the temperature coefficient of platinum is 0.00374/°C. At 20°C, a 1000-ohm platinum resistor will change to 1003.74 ohms when the temperature rises to 21°C.
Common metals' resistivity and their temperature coefficients:
Temperature (°C) | Resistivity | Temperature Coefficient aR/°C-1
Silver 20 | 1.59 | 0.0038 (20°C)
Copper 20 | 1.68 | 0.00393 (20°C)
Gold 20 | 2.40 | 0.00324 (20°C)
Aluminum 20 | 2.65 | 0.00429 (20°C)
Zinc 20 | 5.20 | 0.00419 (0°C~100°C)
Nickel 20 | 6.84 | 0.0069 (0°C~100°C)
Iron 20 | 9.71 | 0.00651 (20°C)
The above content is quite theoretical; we only need to understand that:
1. Metals change their resistance with temperature.
2. Knowing the initial resistance, we can calculate the resistance at a specific temperature based on TCR. In other words, knowing the resistance value also allows us to reverse-engineer the current temperature based on TCR.
Thus, the principle of temperature control box mods becomes clear:
Based on the initial resistance and the TCR value of specific metals, we can calculate the temperature when the resistance reaches a certain value.
【Temperature-Resistance Curve】
We know that the resistance of a heating wire is determined by four factors: 1. The length of the wire; 2. The cross-sectional area of the wire; 3. The material; 4. The temperature.
Once a heating wire is wound, the first three factors are fixed, leaving only the last one: temperature.
The built-in chip in the box mod continuously scans the resistance value (at a very high frequency, up to dozens to hundreds of times per second) and uses the TCR value to estimate the current temperature.
To help everyone understand intuitively, I created a schematic diagram of the working principle:
Here we can see that the heating wire of the same material has the same TCR, so the trend of temperature change (the slope of the curve) is consistent. However, due to different initial resistances, the resistance values at different temperatures are also different.
Based on different heating wire types, such as Ni, Ti, and SS, engineers input their data into the box mod's chip, and the box mod operates according to this judgment standard.
Having covered the theoretical part, let's move on to practical applications.
【Temperature Control Flavor Adjustment】
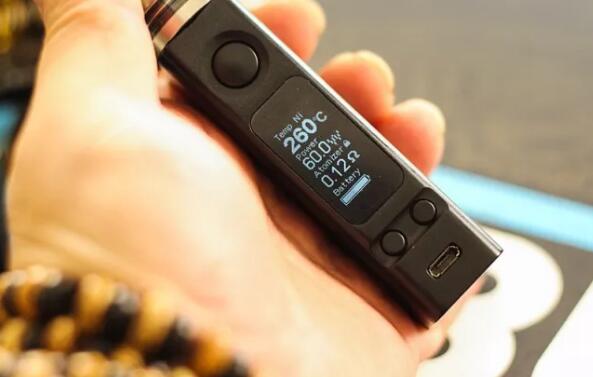
Everyone should pay attention to the curve above. The box mod executes according to the program; if the initial resistance is recognized as 0.4 ohms, then when it reaches 0.95 ohms, the box mod recognizes the temperature as 95°C. When it reaches 1.2 ohms, it recognizes the temperature as 200°C.
However, sometimes situations arise where, for example, the box mod's upper temperature limit is 300°C, but even when set to the highest temperature, the heating wire still feels insufficiently powerful, producing only a small amount of vapor.
This may relate to the wire's diameter, number of wraps, etc., or it could be a matter of personal taste. So aside from redoing the heating wire or changing the atomizer, is there no other way?
There is another method: deceive the system!
By artificially recognizing the initial resistance as higher, for example, recognizing it as 0.5 ohms, when it heats up to the same 1.2 ohms, the system believes the temperature is only 95°C. However, we know that the heating wire's temperature has actually reached 200°C (because a 0.4-ohm heating wire must reach 200°C to achieve 1.2 ohms). When it heats to 1.5 ohms, the system thinks it has just reached 200°C, but in reality, the temperature has already exceeded 300°C.
Therefore, if you feel that the flavor in temperature control is not very intense, you just need to set the initial resistance recognition a bit higher. Specifically, you can increase it by 0.05 ohms, 0.08 ohms, or 0.1 ohms based on your actual operation.
Thus, electronic cigarettes' "temperature control" is fundamentally a form of "variable frequency power output."
Currently, temperature control electronic cigarette mods typically have two types of power output settings: one allows users to set the temperature, and the chip automatically adjusts the power output without user intervention. The other allows users to set both the output temperature and the maximum power output.
For example, with the same temperature control atomizer set to 220°C, the experience differs significantly between using a maximum power output of 200W and a maximum power output of 20W.
So how should we set it?
It still depends on the atomizer's intended use. You can refer to the power used under variable voltage. If it is a mouth-to-lung atomizer, the power can be set lower. For example, using a five-piece chess atomizer, typically set to around 20W, if you create a temperature control atomizer set to 220°C, the output power can also be set to 20W.
If it is a temperature control dripping or large cloud atomizer, you need to increase the power to heat the coil quickly, avoiding the situation where the coil only reaches the set temperature halfway through the puff, affecting flavor and vapor volume. For example, if you usually use 80W or 100W, then the power output under temperature control can also be set to 80 or 100W.
Some temperature control mods come with a "dry burn protection" feature to prevent burning the atomizer. If your mod frequently prompts dry burn, check if there is still e-liquid in the atomizer and that the atomizer is adequately saturated. If so, consider lowering the output power under temperature control.
The specific operation method is:
For mods with built-in resistance adjustment features, such as the SMOK Knight Kit's Koopor mini2 mod, G-PRIV mod, etc., there is a resistance adjustment function in the menu, generally adjustable within a range of +/-0.05Ω, which can be directly calibrated for use. Generally speaking, for temperature control heating wires like Ti and Ni, a 0.05Ω change in resistance will lead to a significant difference in temperature control temperature, and this range is sufficient.
For mods that do not have a resistance adjustment feature in the menu, you can also use manual methods to intervene:
1. Allow the atomizer to cool completely.
2. Attach the atomizer to the mod; the mod will automatically recognize the resistance (some mods require manual recognition; refer to the respective mod's manual for details), recognizing the initial resistance.
3. Briefly press the fire button for 0.5 seconds to heat the heating wire, then quickly remove it and reattach the atomizer to recognize the resistance again (or manually re-recognize the resistance) to obtain a higher resistance value than in step 2.
4. If the value exceeds the expected difference, wait a few seconds and recognize again; if it is below the expected difference, repeat step 3.
This method is applicable in several situations:
1. The previously mentioned unsuitable heating wire situation.
2. More commonly, in cases where the temperature control heating wire has aged after several tanks of e-liquid, you will find that no matter how high you set the temperature, the vapor is not ideal. In this case, you need to manually adjust the heating wire's resistance.
3. For heating wires that are functioning normally, if you raise their initial resistance by 0.05 ohms, the set temperature control temperature can be lowered significantly; for example, if it originally needed 380F, now 260F can still produce good vapor. The benefit of this is to reduce some misoperations (like setting the temperature too high).
This method is suitable for some mainstream mods, but there are special mods, like Eleaf's iStick Pico, that do not support this method and instead use TCR parameter adjustment methods.
#p#分页标题#e#