How Should Beginners Choose Coil-Building Tools for Vaping?
Choose the heating wire that suits your atomizer. Different atomizers require different coil materials and wire gauges. If you are not sure, you can ask us by leaving a message on the official account, or contact the store customer service directly if it
First, choose the heating wire that matches your atomizer. Different atomizers are compatible with different wire materials and gauges. If you’re not sure, feel free to ask us—just leave a message under our official account, or if it’s urgent, contact the store customer service directly.
2. Coil jig Once you’ve confirmed the inner diameter that your atomizer deck is suitable for, wrap the wire around the corresponding position on the coil jig, turn by turn. For a 2.5mm inner diameter, just use the 2.5 step. 3. Coil winding tool (optional) If you can’t wind a perfect coil by hand, or if you’re a perfectionist, you can choose this inexpensive and practical coil winding tool. It’s very easy to use, and it helps you make very standard coils. Remember to buy the size you need, or simply get a full set with all diameters for convenience—they’re not expensive. 4. Coil wrapping Here’s an example of a neatly wrapped heating coil.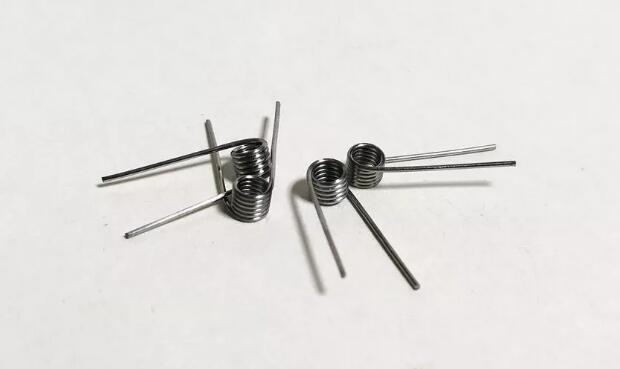 5. Screwdriver
Most atomizers come with a compatible screwdriver when purchased, but we recommend buying a T-handle wrench instead. It’s less likely to damage screws and generally lasts longer. Many atomizer hex screws get stripped because the wrong hex tool was used. The screwdriver is used to secure the finished heating coil into the atomizer’s post holes.
6. Diagonal cutters
Diagonal cutters help trim off the excess wire leads. Choosing a good pair is especially important—this is not a tool you should cheap out on, or you may later find yourself unable to cut thicker wire cleanly.
7. Ceramic tweezers
After installing the heating coil, you’ll need to screw the atomizer onto the device and pulse the coil. While pulsing, gently scrape or strum the surface of the coil with ceramic tweezers to help the oxide insulation layer form more quickly on the wire surface. Never use ordinary metal tweezers to pinch the coil while power is on, as this can cause a short circuit and damage the coil immediately.
8. Coil building tab (optional)
Nowadays, most vape mods can replace the function of a coil building tab. Unless you’re very particular or you’re sure you need one, it’s optional.
9. Scissors
After the coil has been pulsed and adjusted, you need to thread cotton through the inside of the coil. Use scissors to trim off the excess cotton. A small, portable pair is fine—we recommend this kind of small folding scissors.
10. Metal tweezers (optional)
Metal tweezers are not a must-have, but pointed metal tweezers can help you easily fluff and separate the cotton tails, which improves e-liquid wicking. If you don’t have metal tweezers, you can also use scissors or ceramic tweezers to do a bit of scraping and adjustment.
5. Screwdriver
Most atomizers come with a compatible screwdriver when purchased, but we recommend buying a T-handle wrench instead. It’s less likely to damage screws and generally lasts longer. Many atomizer hex screws get stripped because the wrong hex tool was used. The screwdriver is used to secure the finished heating coil into the atomizer’s post holes.
6. Diagonal cutters
Diagonal cutters help trim off the excess wire leads. Choosing a good pair is especially important—this is not a tool you should cheap out on, or you may later find yourself unable to cut thicker wire cleanly.
7. Ceramic tweezers
After installing the heating coil, you’ll need to screw the atomizer onto the device and pulse the coil. While pulsing, gently scrape or strum the surface of the coil with ceramic tweezers to help the oxide insulation layer form more quickly on the wire surface. Never use ordinary metal tweezers to pinch the coil while power is on, as this can cause a short circuit and damage the coil immediately.
8. Coil building tab (optional)
Nowadays, most vape mods can replace the function of a coil building tab. Unless you’re very particular or you’re sure you need one, it’s optional.
9. Scissors
After the coil has been pulsed and adjusted, you need to thread cotton through the inside of the coil. Use scissors to trim off the excess cotton. A small, portable pair is fine—we recommend this kind of small folding scissors.
10. Metal tweezers (optional)
Metal tweezers are not a must-have, but pointed metal tweezers can help you easily fluff and separate the cotton tails, which improves e-liquid wicking. If you don’t have metal tweezers, you can also use scissors or ceramic tweezers to do a bit of scraping and adjustment.